Category: IT

  • Setting Up an OpenCV CUDA Dev Environment with Docker and Debugging via VSCode

    Docker OpenCV CUDA Python VSCode RTX 3060

    To use CUDA acceleration with OpenCV, pip install opencv-python simply won’t cut it. CUDA support requires building OpenCV from source. In this post, I’ll show you how to set up a clean, isolated development environment using Docker — without polluting your host system — and debug your code directly inside the container using VSCode.


    Why Can’t We Just Use pip install?

    The opencv-python package on PyPI is a generic build with no CUDA support. CUDA features must be enabled at compile time by linking against the CUDA libraries.

    MethodCUDA SupportNotes
    pip install opencv-pythonGeneric build, CPU only
    Build from source (host)Pollutes host environment
    Docker + build from sourceIsolated, clean — recommended

    1 Prerequisites

    Make sure the following are installed on your host machine:

    • NVIDIA Driver (verify with nvidia-smi)
    • Docker
    • nvidia-container-toolkit
    # Install nvidia-container-toolkit
    sudo apt install nvidia-container-toolkit
    sudo systemctl restart docker
    
    # Verify GPU is accessible inside Docker
    docker run --gpus all --rm nvidia/cuda:12.8.0-base-ubuntu22.04 nvidia-smi
    💡 Note
    You do NOT need to install the CUDA Toolkit (nvcc) on your host. It’s already included inside the Docker image.

    2 Run the NVIDIA Official CUDA Image

    docker run --gpus all -it \
      --name opencv-cuda \
      -v /your/project/path:/workspace \
      nvidia/cuda:12.8.0-cudnn-devel-ubuntu22.04 \
      bash

    Verify GPU and nvcc inside the container:

    nvcc --version
    nvidia-smi
    ✅ Expected Output
    nvcc: NVIDIA (R) Cuda compiler driver
    Cuda compilation tools, release 12.8
    
    NVIDIA GeForce RTX 3060  |  CUDA Version: 12.8

    3 Install Dependencies

    If apt is slow, switch to a faster mirror first:

    # Switch to a faster mirror (optional)
    sed -i 's/archive.ubuntu.com/mirror.kakao.com/g' /etc/apt/sources.list
    sed -i 's/security.ubuntu.com/mirror.kakao.com/g' /etc/apt/sources.list
    
    apt update && apt install -y \
      python3 python3-pip python3-dev \
      cmake git g++ \
      libgtk2.0-dev pkg-config \
      libavcodec-dev libavformat-dev libswscale-dev
    
    pip3 install numpy

    4 Build OpenCV from Source

    cd /workspace
    
    git clone https://github.com/opencv/opencv.git
    git clone https://github.com/opencv/opencv_contrib.git
    
    cd opencv && mkdir build && cd build
    
    cmake .. \
      -D WITH_CUDA=ON \
      -D OPENCV_CUDA_ARCH_BIN="8.6" \
      -D CUDA_ARCH_BIN="8.6" \
      -D CUDA_ARCH_PTX="" \
      -D OPENCV_EXTRA_MODULES_PATH=/workspace/opencv_contrib/modules \
      -D WITH_CUBLAS=ON \
      -D BUILD_opencv_python3=ON \
      -D CMAKE_BUILD_TYPE=Release
    💡 CUDA_ARCH_BIN by GPU
    RTX 3060 → 8.6  |  RTX 3090 → 8.6  |  RTX 4090 → 8.9  |  RTX 5070 Ti → 8.9 ~ 9.0

    After cmake completes, verify these lines in the output:

    --   NVIDIA CUDA:   YES (ver 12.8, CUFFT CUBLAS)  ✅
    --     NVIDIA GPU arch:  86                        ✅
    --   cuDNN:          YES (ver 9.7.0)               ✅
    --   Python 3:
    --     Libraries:    /usr/lib/.../libpython3.10.so ✅
    --     numpy:        .../numpy/_core/include       ✅

    Build and install (takes 30min ~ 1hr):

    make -j$(nproc)
    make install

    5 Verify the Build

    python3 -c "
    import cv2
    print('OpenCV version:', cv2.__version__)
    print('CUDA devices:', cv2.cuda.getCudaEnabledDeviceCount())
    "
    ✅ Success
    OpenCV version: 4.14.0-pre
    CUDA devices: 1

    6 Save the Container as an Image

    If you exit the container, everything will be lost (due to –rm). Commit it as a reusable image from a new host terminal:

    # On the host
    docker ps  # Get container ID
    docker commit <container_id> opencv-cuda:latest
    
    # Verify
    docker images | grep opencv-cuda
    ⚠️ Image Size
    The resulting image will be around 13GB. Using a multi-stage Dockerfile build can reduce this to 4–5GB.

    7 Debug Inside the Container with VSCode

    Install these two VSCode extensions:

    • Remote – SSH (already installed)
    • Dev Containers (install additionally)

    Start the container:

    docker run --gpus all -it \
      --name opencv-cuda \
      -v /your/project/path:/workspace \
      opencv-cuda:latest bash

    In VSCode: click the blue button at the bottom-left → Attach to Running Container → select opencv-cuda

    Create .vscode/launch.json:

    {
      "version": "0.2.0",
      "configurations": [
        {
          "name": "Python Debugger: Current File",
          "type": "debugpy",
          "request": "launch",
          "program": "${file}",
          "console": "integratedTerminal"
        }
      ]
    }

    8 CPU vs GPU Speed Comparison

    First Attempt — Single GaussianBlur

    import cv2
    import numpy as np
    import time
    
    img = np.random.randint(0, 255, (4096, 4096, 3), dtype=np.uint8)
    
    # CPU
    start = time.time()
    result_cpu = cv2.GaussianBlur(img, (21, 21), 0)
    cpu_time = time.time() - start
    print(f"CPU time: {cpu_time:.4f}s")
    
    # GPU
    gpu_img = cv2.cuda_GpuMat()
    gpu_img.upload(img)
    start = time.time()
    gpu_filter = cv2.cuda.createGaussianFilter(cv2.CV_8UC3, cv2.CV_8UC3, (21, 21), 0)
    result_gpu = gpu_filter.apply(gpu_img)
    result_gpu.download()
    gpu_time = time.time() - start
    print(f"GPU time: {gpu_time:.4f}s")
    Result
    CPU time: 0.0437s
    GPU time: 0.0982s
    GPU is 0.4x slower 😅

    The GPU was slower because the upload/download overhead exceeded the actual computation time for a single operation.

    Second Attempt — Chained Operations (with Error)

    laplacian_filter = cv2.cuda.createLaplacianFilter(
        cv2.CV_8UC3, cv2.CV_8UC3  # ← 3-channel attempt
    )
    ❌ Error
    OpenCV Error: (-215:Assertion failed) scn == 1 || scn == 4
    in function 'LinearFilter'

    Cause: The CUDA Laplacian filter only supports 1-channel (grayscale) or 4-channel images. 3-channel BGR images are not supported.

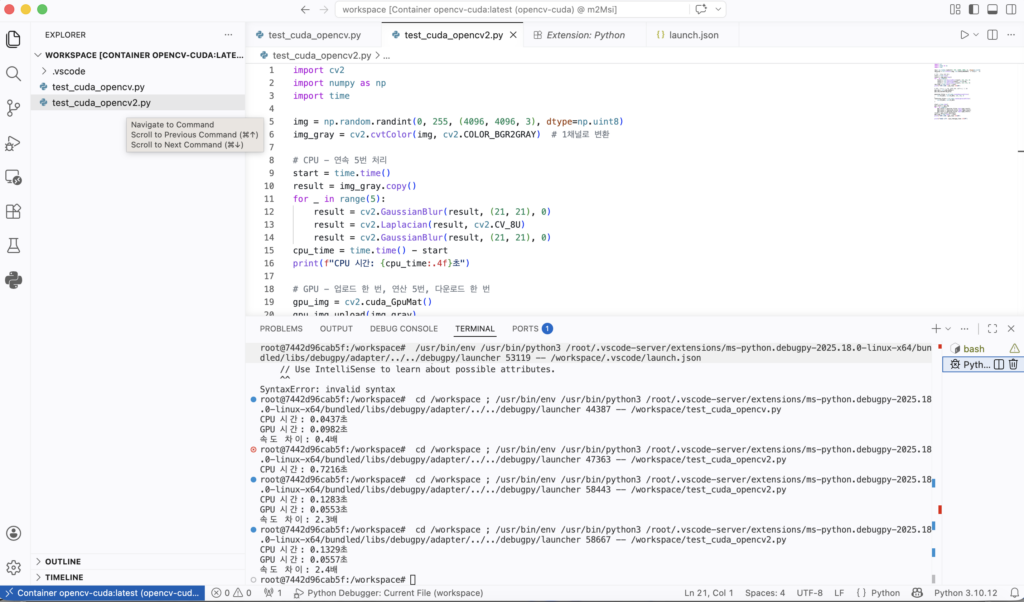
    Fixed Code — Grayscale + 5 Chained Operations

    import cv2
    import numpy as np
    import time
    
    img = np.random.randint(0, 255, (4096, 4096, 3), dtype=np.uint8)
    img_gray = cv2.cvtColor(img, cv2.COLOR_BGR2GRAY)  # Convert to 1 channel
    
    # CPU
    start = time.time()
    result = img_gray.copy()
    for _ in range(5):
        result = cv2.GaussianBlur(result, (21, 21), 0)
        result = cv2.Laplacian(result, cv2.CV_8U)
        result = cv2.GaussianBlur(result, (21, 21), 0)
    cpu_time = time.time() - start
    print(f"CPU time: {cpu_time:.4f}s")
    
    # GPU — upload once, compute 15 times, download once
    gpu_img = cv2.cuda_GpuMat()
    gpu_img.upload(img_gray)
    
    gaussian_filter = cv2.cuda.createGaussianFilter(cv2.CV_8UC1, cv2.CV_8UC1, (21, 21), 0)
    laplacian_filter = cv2.cuda.createLaplacianFilter(cv2.CV_8UC1, cv2.CV_8UC1)
    
    start = time.time()
    gpu_result = gpu_img
    for _ in range(5):
        gpu_result = gaussian_filter.apply(gpu_result)
        gpu_result = laplacian_filter.apply(gpu_result)
        gpu_result = gaussian_filter.apply(gpu_result)
    result = gpu_result.download()
    gpu_time = time.time() - start
    print(f"GPU time: {gpu_time:.4f}s")
    print(f"Speedup: {cpu_time/gpu_time:.1f}x")
    ✅ Final Result
    CPU time: 0.1283s
    GPU time: 0.0553s
    Speedup: 2.3x 🎉

    Key Takeaways

    PointDetail
    pip install opencvNo CUDA — must build from source
    Why DockerIsolated environment, host stays clean
    GPU slower than CPUupload/download overhead > computation time
    GPU faster than CPUMore chained operations = better GPU efficiency
    Laplacian errorCUDA only supports CV_8UC1 (grayscale), not BGR
    VSCode debuggingDev Containers lets you F5-debug inside a container
  • OpenCV CUDA 개발환경 Docker로 구축하고 VSCode에서 디버깅까지

    Docker OpenCV CUDA Python VSCode RTX 3060

    OpenCV에서 CUDA 가속을 쓰려면 pip install opencv-python으로는 안 됩니다. CUDA 지원은 소스에서 직접 빌드해야 활성화됩니다. 하지만 호스트 시스템을 더럽히지 않고, Docker를 이용해 깔끔하게 환경을 구축하고 VSCode에서 디버깅까지 하는 방법을 정리했습니다.


    왜 pip install로는 안 되나?

    PyPI에 올라온 opencv-python은 범용 빌드라 CUDA가 빠져 있습니다. OpenCV는 빌드 시점에 CUDA 라이브러리를 링크해서 컴파일해야 CUDA 기능이 활성화됩니다.

    방법CUDA 지원비고
    pip install opencv-python범용 빌드, CPU만
    소스 직접 빌드호스트 환경 오염
    Docker + 소스 빌드격리, 깔끔, 추천

    1 환경 준비

    호스트에 다음이 설치되어 있어야 합니다.

    • NVIDIA 드라이버 (nvidia-smi로 확인)
    • Docker
    • nvidia-container-toolkit
    # nvidia-container-toolkit 설치
    sudo apt install nvidia-container-toolkit
    sudo systemctl restart docker
    
    # GPU가 Docker에서 보이는지 확인
    docker run --gpus all --rm nvidia/cuda:12.8.0-base-ubuntu22.04 nvidia-smi
    💡 참고
    CUDA Toolkit(nvcc)은 호스트에 설치하지 않아도 됩니다. Docker 이미지 안에 포함되어 있습니다.

    2 NVIDIA 공식 CUDA 이미지로 컨테이너 실행

    docker run --gpus all -it \
      --name opencv-cuda \
      -v /your/project/path:/workspace \
      nvidia/cuda:12.8.0-cudnn-devel-ubuntu22.04 \
      bash

    컨테이너 안에서 GPU 및 nvcc 확인:

    nvcc --version
    nvidia-smi
    ✅ 정상 출력
    nvcc: NVIDIA (R) Cuda compiler driver
    Cuda compilation tools, release 12.8
    
    NVIDIA GeForce RTX 3060  |  CUDA Version: 12.8

    3 의존성 설치

    apt 속도가 느리다면 카카오 미러로 변경합니다.

    # 카카오 미러로 변경 (한국 사용자 권장)
    sed -i 's/archive.ubuntu.com/mirror.kakao.com/g' /etc/apt/sources.list
    sed -i 's/security.ubuntu.com/mirror.kakao.com/g' /etc/apt/sources.list
    
    apt update && apt install -y \
      python3 python3-pip python3-dev \
      cmake git g++ \
      libgtk2.0-dev pkg-config \
      libavcodec-dev libavformat-dev libswscale-dev
    
    pip3 install numpy

    4 OpenCV 소스 빌드

    cd /workspace
    
    git clone https://github.com/opencv/opencv.git
    git clone https://github.com/opencv/opencv_contrib.git
    
    cd opencv && mkdir build && cd build
    
    cmake .. \
      -D WITH_CUDA=ON \
      -D OPENCV_CUDA_ARCH_BIN="8.6" \
      -D CUDA_ARCH_BIN="8.6" \
      -D CUDA_ARCH_PTX="" \
      -D OPENCV_EXTRA_MODULES_PATH=/workspace/opencv_contrib/modules \
      -D WITH_CUBLAS=ON \
      -D BUILD_opencv_python3=ON \
      -D CMAKE_BUILD_TYPE=Release
    💡 CUDA_ARCH_BIN GPU별 값
    RTX 3060 → 8.6  |  RTX 3090 → 8.6  |  RTX 4090 → 8.9  |  RTX 5070 Ti → 8.9 ~ 9.0

    cmake 완료 후 반드시 아래 항목 확인:

    --   NVIDIA CUDA:   YES (ver 12.8, CUFFT CUBLAS)  ✅
    --     NVIDIA GPU arch:  86                        ✅
    --   cuDNN:          YES (ver 9.7.0)               ✅
    --   Python 3:
    --     Libraries:    /usr/lib/.../libpython3.10.so ✅
    --     numpy:        .../numpy/_core/include       ✅

    빌드 및 설치 (30분~1시간 소요):

    make -j$(nproc)
    make install

    5 빌드 확인

    python3 -c "
    import cv2
    print('OpenCV version:', cv2.__version__)
    print('CUDA devices:', cv2.cuda.getCudaEnabledDeviceCount())
    "
    ✅ 성공 출력
    OpenCV version: 4.14.0-pre
    CUDA devices: 1

    6 이미지 저장

    컨테이너를 나가면 빌드한 내용이 사라집니다. 호스트의 새 터미널에서 커밋해 이미지로 저장합니다.

    # 호스트에서
    docker ps  # 컨테이너 ID 확인
    docker commit <container_id> opencv-cuda:latest
    
    # 확인
    docker images | grep opencv-cuda
    ⚠️ 이미지 크기
    빌드 결과물이 모두 포함되어 약 13GB 정도 됩니다. 멀티스테이지 빌드를 사용하면 4~5GB로 줄일 수 있습니다.

    7 VSCode Dev Containers로 디버깅 연결

    VSCode 확장 2개를 설치합니다.

    • Remote – SSH (기존)
    • Dev Containers (추가 설치)

    컨테이너를 실행한 후:

    docker run --gpus all -it \
      --name opencv-cuda \
      -v /your/project/path:/workspace \
      opencv-cuda:latest bash

    VSCode 왼쪽 하단 파란 버튼 → Attach to Running Containeropencv-cuda 선택

    .vscode/launch.json 생성:

    {
      "version": "0.2.0",
      "configurations": [
        {
          "name": "Python Debugger: Current File",
          "type": "debugpy",
          "request": "launch",
          "program": "${file}",
          "console": "integratedTerminal"
        }
      ]
    }

    8 CPU vs GPU 속도 비교 테스트

    첫 번째 시도 – 단순 GaussianBlur 1회

    import cv2
    import numpy as np
    import time
    
    img = np.random.randint(0, 255, (4096, 4096, 3), dtype=np.uint8)
    
    # CPU
    start = time.time()
    result_cpu = cv2.GaussianBlur(img, (21, 21), 0)
    cpu_time = time.time() - start
    print(f"CPU 시간: {cpu_time:.4f}초")
    
    # GPU
    gpu_img = cv2.cuda_GpuMat()
    gpu_img.upload(img)
    start = time.time()
    gpu_filter = cv2.cuda.createGaussianFilter(cv2.CV_8UC3, cv2.CV_8UC3, (21, 21), 0)
    result_gpu = gpu_filter.apply(gpu_img)
    result_gpu.download()
    gpu_time = time.time() - start
    print(f"GPU 시간: {gpu_time:.4f}초")
    결과
    CPU 시간: 0.0437초
    GPU 시간: 0.0982초
    속도 차이: 0.4배 (GPU가 더 느림 😅)

    GPU가 더 느린 이유는 upload/download 전송 오버헤드가 연산 시간보다 크기 때문입니다.

    두 번째 시도 – 연속 연산 (Laplacian 에러 발생)

    laplacian_filter = cv2.cuda.createLaplacianFilter(
        cv2.CV_8UC3, cv2.CV_8UC3  # ← 3채널로 생성 시도
    )
    ❌ 에러 발생
    OpenCV Error: (-215:Assertion failed) scn == 1 || scn == 4
    in function 'LinearFilter'

    원인: CUDA Laplacian 필터는 1채널(그레이스케일) 또는 4채널만 지원합니다. 3채널(BGR) 컬러 이미지는 지원하지 않습니다.

    수정 코드 – 그레이스케일 변환 후 연속 연산 5회

    import cv2
    import numpy as np
    import time
    
    img = np.random.randint(0, 255, (4096, 4096, 3), dtype=np.uint8)
    img_gray = cv2.cvtColor(img, cv2.COLOR_BGR2GRAY)  # 1채널 변환
    
    # CPU
    start = time.time()
    result = img_gray.copy()
    for _ in range(5):
        result = cv2.GaussianBlur(result, (21, 21), 0)
        result = cv2.Laplacian(result, cv2.CV_8U)
        result = cv2.GaussianBlur(result, (21, 21), 0)
    cpu_time = time.time() - start
    print(f"CPU 시간: {cpu_time:.4f}초")
    
    # GPU - 업로드 1번, 연산 15번, 다운로드 1번
    gpu_img = cv2.cuda_GpuMat()
    gpu_img.upload(img_gray)
    
    gaussian_filter = cv2.cuda.createGaussianFilter(cv2.CV_8UC1, cv2.CV_8UC1, (21, 21), 0)
    laplacian_filter = cv2.cuda.createLaplacianFilter(cv2.CV_8UC1, cv2.CV_8UC1)
    
    start = time.time()
    gpu_result = gpu_img
    for _ in range(5):
        gpu_result = gaussian_filter.apply(gpu_result)
        gpu_result = laplacian_filter.apply(gpu_result)
        gpu_result = gaussian_filter.apply(gpu_result)
    result = gpu_result.download()
    gpu_time = time.time() - start
    print(f"GPU 시간: {gpu_time:.4f}초")
    print(f"속도 차이: {cpu_time/gpu_time:.1f}배")
    ✅ 최종 결과
    CPU 시간: 0.1283초
    GPU 시간: 0.0553초
    속도 차이: 2.3배 🎉

    핵심 정리

    포인트내용
    pip install opencvCUDA 미포함, 소스 빌드 필요
    Docker 사용 이유호스트 시스템 오염 없이 격리된 환경 구축
    GPU가 느린 경우upload/download 오버헤드 > 연산 시간
    GPU가 빠른 경우연산을 많이 연속으로 할수록 유리
    Laplacian 에러CUDA는 1채널(CV_8UC1)만 지원, BGR 불가
    VSCode 디버깅Dev Containers로 컨테이너 안에서 F5 디버깅 가능
  • 내 WordPress 서버를 직접 해킹해봤다 — 셀프 보안 감사 후기

    서비스를 오픈하기 전, 직접 만든 보안 스캐너로 내 WordPress 서버를 점검해봤습니다.

    결과는 꽤 흥미로웠습니다.


    ## 왜 직접 만들었나?

    기존에 WPScan 같은 도구들이 있지만, 내 서버 구조(GCP + Nginx Proxy Manager + WordPress)에 맞게 커스터마이징하고 싶었습니다. 그래서 Python으로 이벤트 드리븐 방식의 보안 스캐너를 직접 구현했습니다.

    구조는 단순합니다.

    “`

    Recon(정보 수집) → Scan(취약점 탐지) → Validate(검증)

    “`

    각 단계는 이벤트 버스로 통신하며 서로 독립적으로 동작합니다. 덕분에 새로운 체크 항목을 추가할 때 기존 코드를 건드리지 않아도 됩니다.


    ## 실제 스캔 결과

    스캐너를 돌리자 몇 초 만에 결과가 나왔습니다.

    “`

    [RECON] WordPress version: 6.x.x

    [SCAN] XML-RPC Enabled → MEDIUM

    [SCAN] wp-cron.php Publicly Accessible → LOW

    [VALIDATE] 2 confirmed

    “`

    총 11가지 항목을 체크했고, 취약점은 2개 발견됐습니다.


    ## 발견된 취약점과 조치

    ### 1. XML-RPC 활성화 (MEDIUM)

    **XML-RPC가 뭔가요?**

    오래된 WordPress 원격 제어 API입니다. 예전에는 스마트폰 앱이나 데스크톱 앱에서 블로그 글을 올릴 때 사용했지만, 2016년 REST API가 도입된 이후로는 사실상 쓸 일이 없습니다.

    **왜 위험한가요?**

    `system.multicall`이라는 기능을 이용하면 한 번의 HTTP 요청으로 수천 개의 비밀번호를 동시에 시도할 수 있습니다. 일반적인 로그인 시도 제한을 우회합니다.

    **조치 방법**

    WordPress 관리자 → 플러그인 → 새로 추가 → `Disable XML-RPC` 검색 후 설치.

    코드 한 줄 안 건드리고 해결됩니다.


    ### 2. wp-cron.php 외부 접근 (LOW)

    **wp-cron이 뭔가요?**

    WordPress의 예약 작업 실행기입니다. 예약 발행, 자동 업데이트 체크, 백업 플러그인 등이 이걸 통해 동작합니다.

    작동 방식이 독특한데, 누군가 사이트를 방문할 때마다 “지금 실행할 예약 작업이 있나?” 를 체크합니다.

    **왜 위험한가요?**

    `/wp-cron.php`를 외부에서 URL로 직접 반복 호출하면 서버에 불필요한 부하를 줄 수 있습니다.

    **조치 방법**

    Nginx Proxy Manager의 Custom Nginx Configuration에 아래를 추가했습니다.

    “`nginx

    location = /wp-cron.php {

    deny all;

    return 403;

    }

    “`

    WordPress에 도달하기 전에 Nginx 레벨에서 차단하는 방식이라 가장 효율적입니다.


    ## 체크했지만 문제없었던 항목들

    오히려 이 부분이 더 안심이 됐습니다.

    | 체크 항목 | 결과 |

    |—|—|

    | 사용자 계정 노출 (REST API) | 안전 |

    | 작성자 URL을 통한 사용자 열거 | 안전 |

    | debug.log 파일 노출 | 안전 |

    | wp-config.php 백업 파일 노출 | 안전 |

    | 업로드 폴더 디렉토리 리스팅 | 안전 |

    | .env 파일 노출 | 안전 |

    | 로그인 페이지 무차별 대입 노출 | 안전 |


    ## 스캐너 코드는 오픈소스로

    이번에 만든 스캐너는 WordPress 외에도 FastAPI, Next.js 서버도 각각 점검할 수 있도록 구성했습니다. GitHub에 오픈소스로 공개할 예정입니다.

    관심 있으신 분들을 위해 기술 스택을 간단히 소개하면:

    **언어:** Python 3.12

    **HTTP 클라이언트:** httpx (비동기)

    **아키텍처:** 이벤트 드리븐 (모듈 간 직접 의존 없음)

    **보안:** 타겟 URL과 인증 정보는 `.env`에만 저장, 코드에 하드코딩 없음


    ## 마치며

    보안은 한 번 설정하고 끝나는 게 아니라 지속적으로 점검해야 합니다.

    서비스를 오픈하기 전에 이런 기본적인 점검을 직접 해보는 것만으로도 꽤 많은 걸 배울 수 있었습니다. 특히 XML-RPC처럼 “원래 있던 기능인데 이제 안 써도 되는 것들”을 정리하는 과정이 흥미로웠습니다.

    다음에는 FastAPI와 Next.js 서버 점검 결과도 공유해보겠습니다.

  • [FastAPI + Ollama] Hunting the Real 404

    🛠️ Debugging Story

    The Route Exists. So Why Is It Returning 404?
    A FastAPI + Ollama Deep Dive 🔍

    I finally got my mini AI-RAG and chatbot service talking to my app. Still a prototype — text only, nothing fancy to look at. But when it all clicked together, that feeling made every late night worth it.

    ⚡ FastAPI🐳 Docker🤖 Ollama☁️ Cloud Run

    🏗️ Service Architecture

    📱 App→☁️ Cloud Run→🔒 Cloudflare→🏠 Home Router→🖥️ Prod Server→💻 Dev Server (RTX 3060)

    😰As the layers stacked up, strange things started happening

    iptables + NordVPN + Docker were interfering with each other — packets were vanishing, and tcpdump was the only thing giving me any direction. My MacBook’s SSH tunnel kept dropping and reconnecting, and at some point the dev server started silently swallowing requests. Nothing in the logs, server still running. Rebooted the MacBook. Fixed immediately.

    Once I got through all that, a 404 was waiting for me.

    🚨The route exists. So why 404?

    POST /internal/llm/chat kept returning 404 inside Docker while working perfectly on the dev server. I printed the route table directly — the endpoint was clearly registered. It wasn’t a proxy issue either, since requests were showing up in the FastAPI logs.

    💡 From inside the container (127.0.0.1): 401 Unauthorized. From outside via nginx: 404 Not Found. Same container, same process, different results.

    🔎The key clue: response size

    The response sizes in the nginx access log looked wrong.

    ⚠️ FastAPI default 404 {"detail":"Not Found"} = 22 bytes
    Actual response sizes = 64–89 bytes
    Something else was generating that 404.

    Working backwards, it was an Ollama error message:

    {“detail”:”model ‘llama3’ not found, try pulling it first”}

    🕵️Root cause: upstream error propagation

    A client service was reading OLLAMA_MODEL=llama3 from GCP Secret Manager and passing it in the request body. The model actually installed was llama3.1:8b. Ollama’s 404 was propagating straight through FastAPI to the client — making it look like the route didn’t exist. Not a routing problem. An upstream error propagation problem.

    🤖Debugging with AI

    I had been relying on AI to analyze the flood of logs. At some point, it started nudging me toward tearing down the architecture itself. I stepped back, worked through it with Claude from scratch, and eventually tracked down the real cause.

    AI compressed what could have been weeks of debugging into days. But holding the design together was still a human job. The more network layers you add, the easier it is for AI to lose the thread too.


    📝What I took away

    1️⃣

    Check the response size

    22 bytes vs 64 bytes. Two 404s can mean completely different things. That single number was the decisive clue.

    2️⃣

    404 doesn’t always mean routing failure

    Upstream errors propagate silently. If you don’t handle them explicitly, they’re very hard to trace.

    3️⃣

    Wrap upstream errors as 502/503

    Returning internal errors and routing errors with the same status code multiplies your debugging time significantly.

    4️⃣

    When nothing makes sense — reboot. Seriously.

    Sometimes the most powerful debugging tool is turning it off and back on. Your mental health will thank you.

    When the logs go quiet, widen your view. 🔭
    And when nothing makes sense — reboot first.